
Many homeowners assume that any flush mount ceiling light installed during construction years ago is there to stay – unless the help of an electrician is enlisted. If you are unhappy with your ceiling light fixtures, don’t settle! It’s easy to install recessed cans in the place of existing ceiling lights. For a DIY guide, follow the steps below.
- Remove your existing ceiling light fixture. This will help you determine the size of the hole in the ceiling you can use for your new recessed lighting fixture. Choosing a recessed can that fits inside your hole is easiest.
- Determine where the ceiling joists in your home are using an electronic stud finder. You’ll need to install the new recessed light fixtures between the ceiling joists, as they cannot sit right against the wood. If your current light fixtures are too close to the ceiling joists, you’ll, unfortunately, need to drill new holes in the wall for recessed light fixtures. Otherwise, you can plan to install the recessed lights exactly where your ceiling lights are now!
- Choose a recessed can and recessed housing specified for “remodel installations” – that means you’re not trying to install a light fixture for new construction. Most stores have a selection that ranges from 3-inch recessed light fixtures to 6-inch light fixtures. The inches are a measure of the diameter of the light fixture. Often, the recessed can and housing are integrated as one unit, and you just purchase a compatible light bulb to go with it.
- Once you are ready to begin the installation, turn off the power. Disconnect your existing ceiling light fixtures from the power source. Pull the electrical cable from your ceiling to the recessed light.
- Insert the electrical cable into the junction box of the recessed light fixture and wire the light using twist-on wire connectors to make the connections. The manufacturer’s instructions will help with this. Remember: The fixture’s black wire goes with the black house wire; white wire goes with white wire; ground wire with ground wire. Continue making all the connections, push the wires in the junction box, and fasten the covers.
- Rotate the housing into the ceiling so the mounting tabs are secure. Attach the baffle and any trim you are using to the housing.
- Install the light bulbs and turn on the power again!
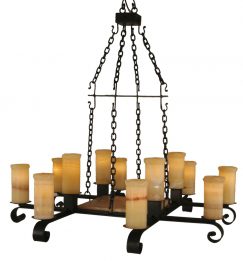
Recessed lights seamlessly blend into any décor. If you have flush mount ceiling lights that have become eyesores, this DIY project will have big results! And if you’re still unhappy with the idea, try a custom chandelier for an even bigger WOW! For tips on installing multiple remodeled recessed lights throughout your home, check out the DIY Network.
Content Provided by: Julia Ritzenthaler